Mostrar mensagens com a etiqueta Roupa. Mostrar todas as mensagens

terça-feira, 13 de março de 2012

Outro vestido de menina do site www.craftinessisnotoptional.com


And now for the Junebug dress tutorial/sew along. (without much fanfare apparently)


You'll need:

1-2 yards of fabric, depending on child's size. I barely scraped by with one yard for my 2T size
6 buttons-for the pattern I provide no larger than 5/8"
thread, sewing and pattern making stuff (ie sewing machine and paper)

You can download the free 2T/3T pattern here. I say @2T/slash/3T because Sadie's kind of in the middle of the two sizes....the finished dimensions of this pattern are 21" around the waist, 8" around for the sleeves (though you can definitely use more elastic to get a wider opening), and 18" from collarbone to hem.

Ok, if you're not using the pattern, let's get going and make your own! First you'll need to trace a tee that fits your child-see more about that here.

This will be the back piece of your bodice-so trace the back neckline. Add seam allowances-I allow for 1/4" in my pattern. Measure down how far you'd like the bodice to go on your child. and draw a line across.


Next, cut out your back piece, and trace it again. Then draw a half-square neckline-dropping off before it hits the fold line. (left side of pattern in pic)

Then cut out that pattern, trace the back piece again, and draw your bodice flap pattern. It should flare out a little bit on the bottom (ie not go straight down), and curve up a little bit where it meets the bodice front piece. Add seam allowances on the top and side of this piece. (again, about 1/4")

Then I drew a sleeve shape like this one for my gathered sleeve. These are really easy to draw and forgiving too. Make sure to square it off, ie, make sure lines are straight.

There. Now label your patterns as shown, and cut out your fabric from the pattern pieces.

Tomorrow: bodice and buttonholes!
 
PARTE 2


Click below for the full tutorial!


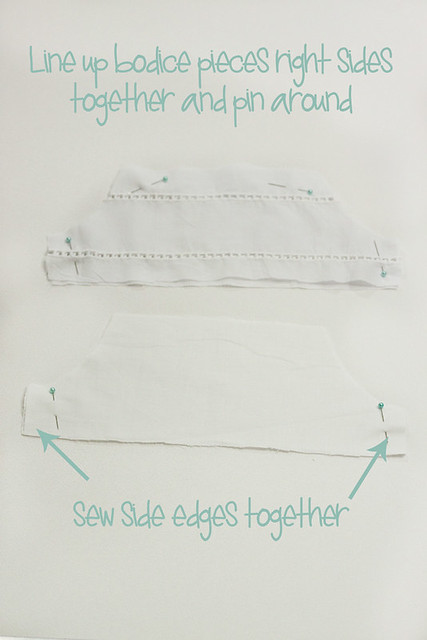
Take your two flap pieces and lay them down right sides together, pin, and sew around the sides and top. Clip the corners, turn right side out and press.


Do the same with the bodice sides, but sew them right sides together-and not at the shoulders or arm holes yet. Clip the corners, and turn right side out. Just the inside little "stair step" portion.

Press well.

Then make a bodice sandwich. place the bodice sides in between bodice back pieces and pin together at the neckline and shoulders.

Sew along the neckline and shoulders.

Flip right sides out and press.

This is what you should have now.

Make sure everything fits together alright. good? good.


Now lay out your buttons and mark where to make your button holes.

Make your button holes and rip them open.

Then lay out the bodice with sides matching so it's placed correctly, and place the bodice flap in the center. Pin and baste to the bottom of the edges of the bodice sides.
 
PARTE 3


Click below for the full tutorial!


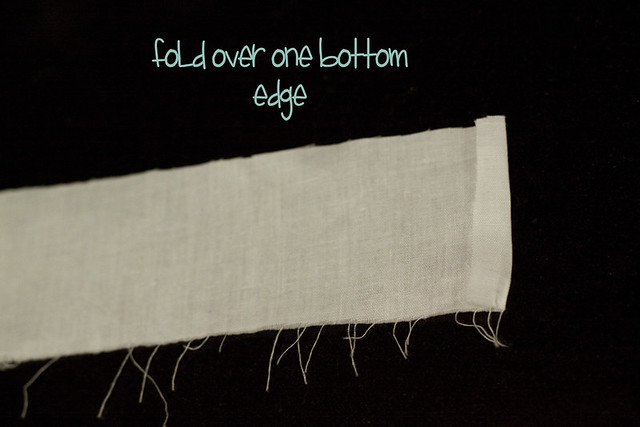
For the sleeves, this is a handy trick to make elastic casings a wee bit easier. Fold over the sleeve 1/4"...

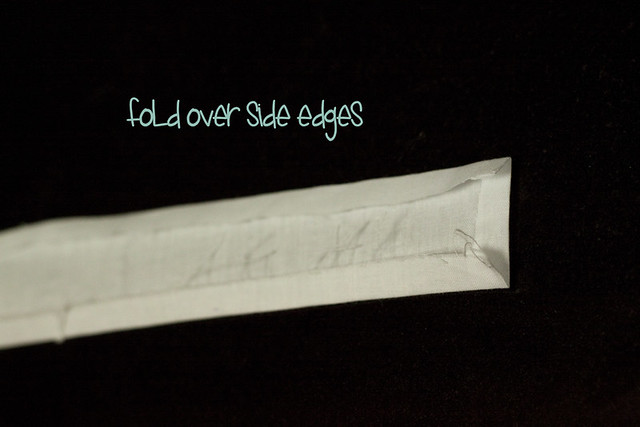
and then another 1/2". (or less, but I wanted a bit of a ruffled look on the edge, so I sewed my casing in about 1/8" from the edge, but more on that later) Do not sew it closed yet!

Then sew a gathering stitch along the curved part of the sleeve and gather to fit the armhole. You can see I concentrated the gathers at the top of the sleeve. It's up to you!

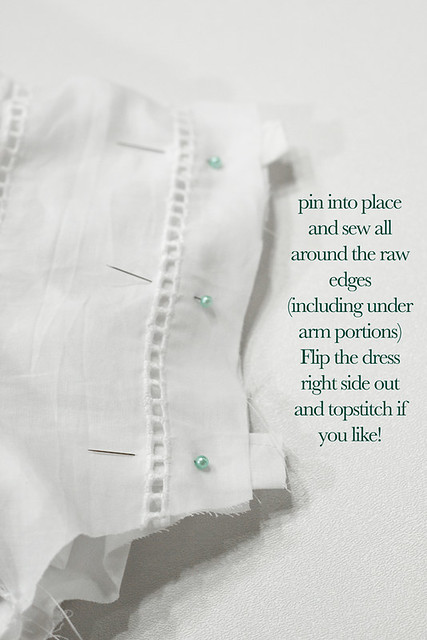
Sew them in and finish the seams, then unfold the ironed part of the sleeves, pin the sides of the bodice and sleeve right sides together and sew and finish them up as well.

For the sleeves, fold down the ironed part once...

..and then once more, then pin, and sew your casing.

Leave a spot open for the elastic. I also sewed a line around close to the other edge, to create the slight ruffle on the edge of the sleeve. Cut your 1/4" elastic for the sleeves (I cut mine 8" long), thread it through with a safety pin, and sew the ends together. Then sew the opening closed. Repeat for other sleeve.

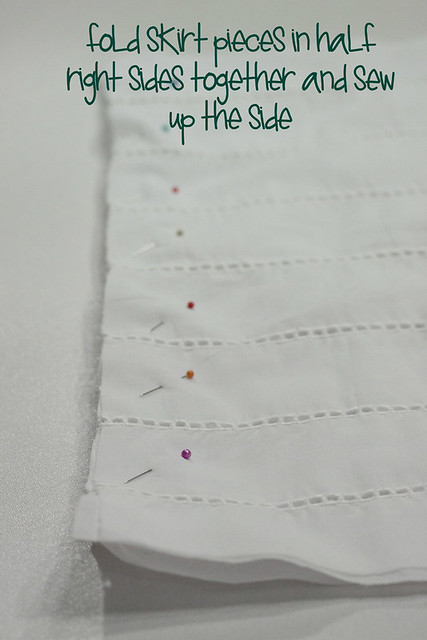
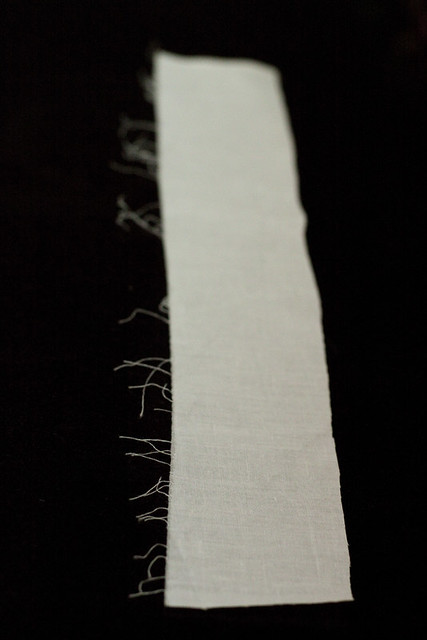
As far as the skirt goes, I didn't have much fabric left, so I cut it into two pieces (20 wide x 16" long), folded the two pieces in half (no pic of this, sorry) and cut the sides into a slight (very slight) A-line shape.

If you're making your own pattern, you can figure out how long to make the skirt by measuring your child...add inches for the hem and seam allowance....and then the width is up to you, it depends on how gathered you want it to be! My width was about twice the measurement of the bodice, if that helps.

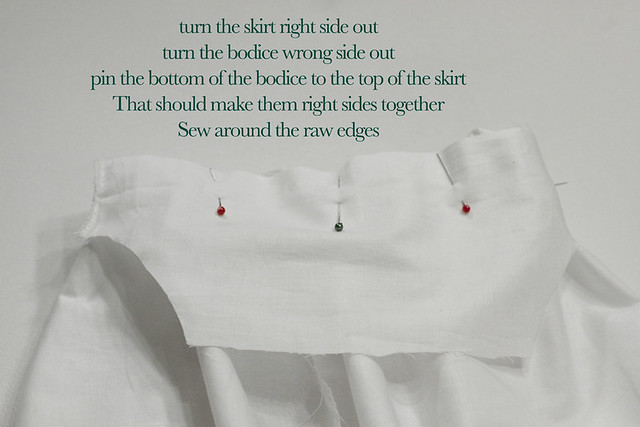
Then I sewed the two pieces right sides together...

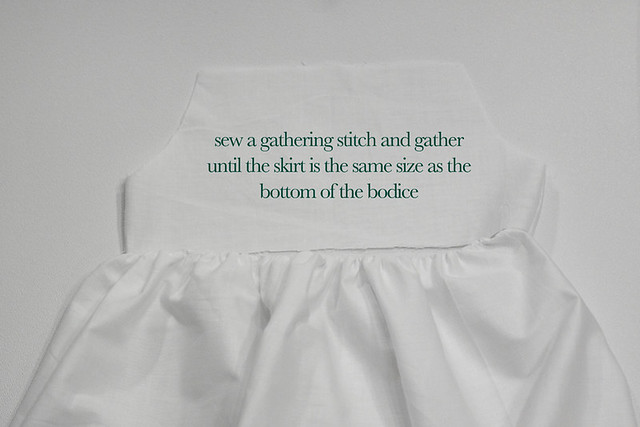
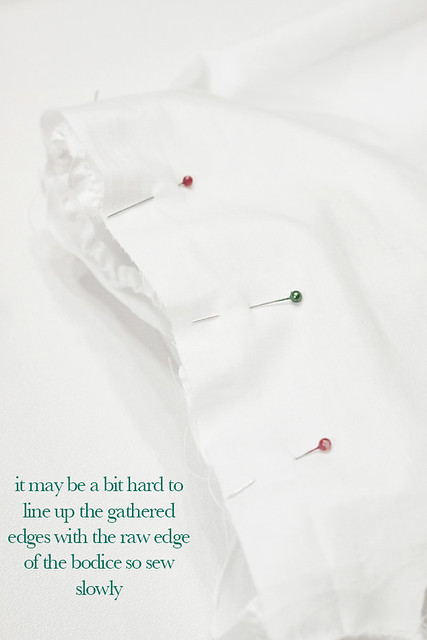
...gathered the top of the skirt to fit the bottom of the bodice...pinned and sewed them right sides together.


Then hemmed the bottom by folding and ironing up 1/2", then another 2". I like a wide hem once in awhile. I sewed two rows of stitching for extra fanciness.

Then sew your buttons on, and you're done!

Solar dress pattern do blog indietutes.blogspot.com

solar dress  pattern

PhotobucketDuring a recent little heat wave, the ease and functionality of the basic sundress - no ruffles, no layers, no sleeves - become rather urgent. Believe it or not, but there are very few 'plain' dresses around here. Smootch's taste tends to run towards drag queen and I try stay out of wardrobe decisions. The high temperature, though, wore Smootch down and a dress without any extras to trap heat and a wide enough base to get a little breeze going was requested.

Happy to oblige, little lady.

PhotobucketThis dress is a simple as I could design, while keeping my mind on wear-ability beyond these few weeks of summer weather. I like a loosely fitting bodice area, with room to grow, and adjustable straps that allow for shirts underneath without getting all bunchy and awkward are nice too. A plain Jane front allows for pockets and embellishments to be added later to make something old seem new. A classic A-line shape works great as a pinafore over fall and winter tees and sweaters.

Photobucket

I'm feelin' pretty good about this one.

Which is why I thought I would make it available as a free pattern for y'all.

The Solar Dress comes in sizes 2/3, 4/5, and 6/7. The sizes are approximated to the US standard sizes (such as you would buy in ready to wear). To give you some idea, Smootch is a petite almost six year old, wears a US 5, and is wearing the Solar Dress size 4/5. Of course, the dress is quite forgiving size-wise, being of simple design, so do not get too hung up on the exactness of it all. (The designer certainly didn't :D)

To assemble the dress, in addition to light or medium weight fabric (try cotton or linen) and coordinating thread, you will also need some 1/4" elastic or clear elastic.


Now before you go clicking the link to get the pattern pieces, I'm going to warn you that the file is rather large. Sorry. I got carried away when drawing out the pattern and coloured the whole thing in.

We got playing.
Photobucket

(Print in 'fast' and 'grayscale' when printing if you don't want to blow out your ink cartridge. If you guys have too many problems with the file, let me know and I will draw up a basic version, sans all the colours.)

Click here to download Solar Dress ePattern.

Print the Solar Dress pattern at a 1:1 scale (or 'no scaling') for correct size.
PhotobucketAssembling the Pattern Puzzle

The first thing to do is assemble the ePattern.

Cut out each piece from the file and assemble the pieces as roughly shown in the illustration on the right.

Align each piece flush as indicated by the lines and colours (it'll all look right as you put it together) and tape together.

The pocket piece is intended to be traced onto another piece of paper, using the drawn pocket as a guide for shape and placement. You could actually cut it straight out the the assembled pattern, however, if you do not mind a big pocket shaped hole in the middle.

Cutting the fabric

To begin, determine your desired size and either trace onto a separate paper or cut along the appropriate line as indicated on the pattern piece.

To cut out the front of the dress, place the full pattern along fabric folded grain-wise, folded edge of fabric aligned with long side of pattern marked 'FOLD'. Cut out piece. (PATTERN INCLUDES SEAM ALLOWANCE - DO NOT ADD SEAM ALLOWANCE WHEN CUTTING OUT FRONT.)

To cut out the back of the dress, fold the paper pattern piece on the dark line running from arm base across chest. The back shape is cut from this dark line and below (the top inch or two is eliminated). Folding saves your pattern, paper, and time, not having to cut out an entire new piece for the back along. With the pattern folded, align in the same manner on folded fabric as you did on the front. As you cut ADD ONE INCH OF ADDITIONAL MATERIAL ON THE TOP OF THE DRESS. This is adding some fabric to put in the elastic back, not accounted for in the pattern.

Additional pieces of fabric needed are bias cut strips for the straps and ties. If you would like to use store bought bias tape, that is excellent, use a double folded version, or you can make your own by cutting stripes of fabric 1 1/2" wide at a 45 degree angle from the fabric grain. Use an iron to press a double fold into the strips and conceal the raw edges. Do not sew the edges closed just yet.

The two straps made of bias tape need to be about 25" to 35" long, depending on your desire for short or long straps and size of dress. For bottom loops to tie straps to, cut two additional pieces of double fold bias tape each about 2" long.

Cut out four pieces of pocket.


Assembling the dress

Start by finishing the top edge of the dress front with a double folded hem.
Photobucket

With your bias tape straps, fold one end of each strap to conceal raw edges. Open up bias tape and align the unfinished end with the arm curve on the front piece. With the tape still open, machine baste the raw edge of the bias tape to the edge of the arm curve (see this bias tape discussion for more information).
Photobucket

Fold closed the tape over the edge of the arm curve. Stitch close to the edge of the tape along the entire length, finishing the arm curve and closing the strap. Repeat for other strap.
Photobucket

(Okay, confession: I'm not actually using bias tape above because of the limitations of the fabric panel I chose. It looks not so smooth - your bias tape will look nicer, trust me.)
Sew a pocket by placing two pocket pieces right sides together and stitching together the curved sides, leaving the straight top open. Turn the pocket right side out, fold the raw edges in on the straight side, and press flat. Stitch the straight side closed. Stitch on the pocket, in the position indicated on the pattern paper, by stitching the curved sides to the dress close to the edge. Be sure to secure the top edges with a few extra stitches for extra strength where it is likely to be pulled on often. Repeat for other pocket.

The top of the back is finished with a piece of thin elastic sewn in. Cut a length of elastic 8" to 10" long (depending on size used). Whether using clear elastic or regular 1/4" elastic, stretch it out along the length of the top raw edge on the back and machine baste the elastic directly to the dress, stretching while sewing.


Photobucket

Fold down the elasticized edge into a double fold and stitched closed, again stretching while sewing (this can be tricky, I admit. Pins help :)
Photobucket

For the back loops, sew closed the 2" long strips of bias tape. Fold loops in half and stitch to elasticized hem, each approximately 3" from the side edge. Or whatever seems like a good distance.
Photobucket

With all straps and loops in place, and the top edges of the front and back pieces finished, you can now stitch the front to the back, right sides together, along the entire length of both sides (stitch from the top down) using a 3/8" seam allowance. I like to stitch the seam flat at the top edge under the arm to avoid irritating sticky-outty seams.

Photobucket


Finish the bottom hem and you've also finished the dress. To do up the straps, run the ends of the straps through the loops and tie together in the middle.
PhotobucketPhotobucket

I realize my instructions here are not nearly as detailed as they usually are. I am a bit time poor this week and since we are running out of warm weather, I thought it best to just toss this out and see what happens. If you have questions or need clarification, comment or email me and I will add it to the instructions.

I hope you and your girl enjoy this dress and the lovely, sunny weather!

Vestido de menina em tricot do site www.straw.com


Little Girl's Dress in Panda Silk DK


Panda Silk DK Little Girl Dress
free knitted dress pattern for little girlDesigned by Gail Tanquary for Crystal Palace Yarns


Description: This adorably sweet little girl�s dress has raglan sleeves and eyelet accents, finished off with a beautiful ribbon waistband.

Level: Advanced Beginner to Intermediate

Sizes: Child size 1 (2, 3, 4, 5, 6) yrs

Materials:
4 (5, 6, 8, 9, 10) - 50 gm balls of Crystal Palace Panda Silk DK (bamboo-SW wool-silk)
Crystal Palace Bamboo needles
16" circular needle - size 3
26" circular needle - size 5
26" circular needle - size 8
9" Straight needles - size 5
1� yds ⅜" ribbon
Buttons 4 (4, 5, 5, 6, 6)


Gauge: 22 sts = 4" (top of dress) 20 sts = 4" (skirt)

Abbreviations: BO- bind off; CO- cast on; cont- continue; k- Knit; K2tog- knit 2 sts together; p- Purl; PM- place marker, PRM- place raglan marker; rep- repeat; rnd- round; RS- right side; ssk- slip slip knit; St st- stockinette stitch (k on the RS and p on the WS); st(s)- stitch(es); tog - together; WS- wrong side; yo- yarn over

Instructions:
Using size 3 - 16" circular needle, CO 85 sts for all sizes. Beginning with a WS row and a purl st, work 3 rows in k1x p1 rib, ending with a WS row.

Buttonhole row: Work rib to last 4 sts, yo, K2 tog, p1, k1.

Work 2 more rows in rib, ending with a RS row. Change to size 5 - 26" circular needle and work next row (WS) as follows:

Rib 8 for button band, PM
Purl 9 for left back, PRM
Purl 12 for sleeve, PRM
Purl 2, place odd colored marker, purl 23 for pattern panel, place odd-colored
marker, purl 2, PRM
Purl 12 for right sleeve, PRM
Purl 9 for right back, PM
Rib 8 for button band.


Next row (RS): Rib across button band, sl marker, (K to within 1 st of next raglan marker, yo, K1, sl marker, K1, yo) 4 times - 8 increases (4 raglans) made. K to last marker, sl marker, work rib to end.
Next row: Rib across button band, purl to last marker, rib to end (slipping all markers)


Begin pattern:
Row 1 (RS):
Rib 8, then making raglan increases at markers as above, knit to first odd-colored marker, P2, (K5, P2) 3 times, knit to rib making raglan increases, rib to end.
Row 2 (WS):
Rib 8, purl to first odd-colored marker, K2, (P5, K2) three times, P to last
marker, rib to end.

Row 3:
Repeat Row 1 to odd-colored marker, P2, (ssk, yo, K1, yo, k2 tog, P2) 3 times,
work as for Row 1 to end.

Row 4:
Repeat Row 2.

Rep these 4 rows, making buttonholes every 8th row (always a RS row), until there are 30 (32, 33, 34, 35, 37) sts on each back section, including sts of button band, ending with a WS row. Work one RS row in pattern without raglan increases; work one WS row in pattern. Piece should measure 4 (4�, 5, 5�, 5�, 6)" from neck ribbing.

Dividing row (RS): Work across sts of back in pattern (do not make raglan increases). Using size 5 straight needle, work across sleeve, leaving remaining sts on circular needle, using it as a holder. (Note: Divide the 2 sts between the yo increases, placing 1 st on the sleeve, the other st on the dress body).

On sleeve section only, work 5 (5, 5, 5, 7, 9) rows in St st, ending with a WS row.
Eyelet row (RS): K1, *yo, K2 tog* across sleeve.
P one row. Work 4 rows St st. BO loosely.


Work across sts of front with size 5 circular needle, eliminating raglan incs. Work across sts of second sleeve with size 5 straight needle. (Note: Make sure to divide the 2 sts between the yo increases, placing 1 st on the sleeve and the other st on the dress body.) Complete as for first sleeve.

Work across sts of back.
Next Row (WS): Rib 8, P to button band, Rib 8, joining back and front together.
Next Row: Rib 8, K to button band, Rib 8.
Next Row: Rib 8, P to button band, Rib 8.
Eyelet Row (RS): Rib 8, K1, (yo, K2 tog) to button band, rib to end.
Next Row: Rib 8, P to button band, Rib 8.

Next row (RS):
Rib 8, increase in every st across by tipping the left needle forward and knitting into the purl bump one row below, then knit into the st on the needle. Rib last 8 sts. Change to size 8 circular needle.
Next Row: Rib across button band, purl to button band, rib button band.
Next Row: BO sts of button band, K to end (eliminate ribbing on button band) and join to knit skirt in the rnd.


Cont knitting skirt until dress measures 14 (16, 17, 20, 22, 24)" from top of neck.

Work eyelet rnd: *yo, K2 tog* all around. Knit 3 more rnds. BO loosely.
Fold on eyelet row and sl stitch hem into place for skirt and sleeves. Lace ribbon through eyelets at waist. Sew bottom of button band in place. Sew on buttons.

Vestido simples de verão para menina do site mesewcrazy.com edo blog patriciaraedesigns.blogspot.com


The fabric used for Chloe's Swinter Dress Remix:
  • Amy Butler's Love Collection, Tumble Roses Tangerine - as the main dress
  • Ty Pennington's Lace in Persimmon - as the Bias Tape

For Madeline's version:
  • Go By Bike Peach Weekends fabric collection by Erin McMorris for Free Spirit - as the main dress
  • Lavender and peach matching fabric I found at clearance in our local fabric store - as the bias tape


or:
_MG_9956_1036proof

What you will need:
1.5 yards Main fabric (the fabric that will be seen)
1.5 yards Lining fabris (should correspond with your main)
Sewing machine
Iron
Scissors
The pattern for the top can be found HERE. The dress bottom I will describe how to make but you don't need a pattern. This is for a 18 month toddler. To enlarge I would copy it going up by 20% for every year you need (aka if you have a 3 year old I would copy it at 120%). Obviously before you cut fabric hold the pattern up to your chica and make sure it looks right. Once you have it the right size and cut out you will need to cut 2 of your main and 2 of your lining on the fold. Once you have done you can cut your skirt bottom. How I did mine was the waist was 3 times the length of the waist portion of the bodice. So I measure the bottom of my bodice, times'd it by 3 and that is how long the skirt needs to be. The length is up to you. I wanted mine longer so that it kept her little leggys warm should she need it. But you can do it tea length or knee length per your needs. Just measure your cuties legs and go with it! You will need to do this on both the lining and the main. With the remaining fabric cut 4 long thin rectangles. These are going to be the straps/ ties. How thick and how long is totally up to you. If you want to really go wild you could do two on each side for a total of 8! I am going to do that next time.
Now that you have all your fabric cut out lets get sewing! Take your bodice top piece of both your man and your lining. Pin them right sides together:
_MG_9946_1026
Once you have them pinned sew the side edges together. Nothing else just the side edges. Now grab your two skirt pieces. One at a time fold your skirt pieces in half so that right sides are facing each other:
_MG_9947_1027
Once you have it pinned sew up the side. Repeat with your second skirt bottom. Now along the top raw edge of your skirt sew a gathering stitch. Gather up the skirt until it is the same circumference as the bottom of your bodice. Do this with both skirt pieces
_MG_9948_1028
Now, with your skirt right side out and your bodice wrong side out, slide your bodice top over your skirt bottom so that the top of the skirt and the bottom of the bodice line up (these parts will be right sides together).
_MG_9949_1029
close up it should look like this;
_MG_9950_1030
Sew along the raw edge, attaching the top to the bottom. Repeat this with your second set of pieces. Now you should have what sort of look like 2 dresses
_MG_9951_1031
Now we are going to make the straps. grab your four pieces rectangle pieces:
_MG_9940_1020
Fold over the bottom of one of the edges
_MG_9942_1022
Now fold over and iron both sides
_MG_9943_1023
Now fold the entire thing in half and iron. Now sew along that open edge closing it. Now you have a strap. Repeat the process with the other three long rectangles. Once you have all four, take your "two" dresses. Turn the dresses so that right sides are facing each other. Line up the top of the dresses. Youa re going ot sew straps in all four corners. Slide a strap in between the two dresses on each end of the top
_MG_9953_1033
Continue doing this with all four straps and pin everything into place. Once you are done sew all the way around the raw edges.
_MG_9954_1034
Now all you have to do is hem your dress and you are done!!! wasn't that super easy!
swinter6
I